Friday, August 9, 2013

Back to School Posters

My O My...where has the summer gone?! I got to spend my last days of summer at Manhattan Beach before going back to work (school). Below are some pictures of all the handmade goodies I created for my classroom; a Birthday poster to help remind my students which month and day their birthday fall in, a Days in School poster to count the number of days in a school year and to also teach placement value, and the Names of the Days in a week to teach time (past, present, future). I'm so excited to share these with my students...I hope they will love it as much as I do! Feeling excited & nervous for the first day...which will be next Tuesday (8/13).  


This is where I posted them in my classroom. :)

Wednesday, July 31, 2013

Surfer Ian

Hello There! Summer is almost ending, but surfing is still in. The International Surf Festival is still going on around the Southern California beaches until Aug. 4. Click here to check out the schedule of events at the International Surf Festival. Here is my version of the Surf Fest where people are up late enjoying the warm summer nights. I'm sure going to miss it. I used TGF Surfer Ian for this one and added a party tag. I am also entering this card into TGF's Fresh Farm Friday - The Great Outdoor Themed Challenge

Wednesday, July 24, 2013

Thank You

Hello There! Happy Wednesday! Time sure does fly when you don't have to work. I have been spending more time crafting and creating projects for my classroom (will blog another time). Here is a Clean and Simple card I made while taking a break from lesson planning. I used this image from TGF Miss Anya Collection. 


I haven't won anything YET from all the challenges I entered so wish me luck!!!

Monday, July 8, 2013

Let's Celebrate Red, White & Blue

Happy Belated Independence Day!!!

Hope everyone had a marvelous red, white, and blue long weekend!

While looking through my scraps, I found red, white, & blue scraps which was perfect for 4th of July. Below is an image of the card all made from scraps except for the doily. It is not your typical size card, it measures 5.5" x 3.25". I used Summer from TGF Roll Call Wild Sprouts Collection 1, and the sentiment is from Stampin' Up. 


I am entering this card into the following challenges:


Good Luck to all those who enter! 

Wednesday, June 26, 2013

Sand, Sun, & Tons of Fun

SUMMER has definitely hit Southern California...it has been soo hot and I am loving it! If you are a teacher like me, you get the luxury of enjoying the summer sun. :) While waiting to go to the beach, I created a fun summer card. I used TGF Cheeky Beach, the sentiment is from the Sunshine set, and their fence die. 


I am also entering this card into the The Greeting Farm's Fresh Farm Friday Challenge.

Happy Summer!!!

Minion Party Decors/ Party Favors

Hello! Below are more pictures of things we created and bought for the party.

"Happy Birthday, Boy" My boyfriend's nickname is Boy.


"Congrats, Kim!"

Minion cups using black ribbon, googly eyes, and hand drawn mouth


Blue utensils wrapped in yellow napkins and sign says "We Hope You Had a Despicably Good Time..."

Minion Twinkies, now called Sara Lee's Golden Creme Cakes 

Our version of "Monster Minions" brownie pops :0

Minion Fruit Roll - Up found at nearly every grocery store since they are promoting the next squeal of "Despicable Me" 

And last but not least, Minion Cheetos Puffs; only if they were shaped like minions! :)

Thanks for looking!


Wednesday, June 19, 2013

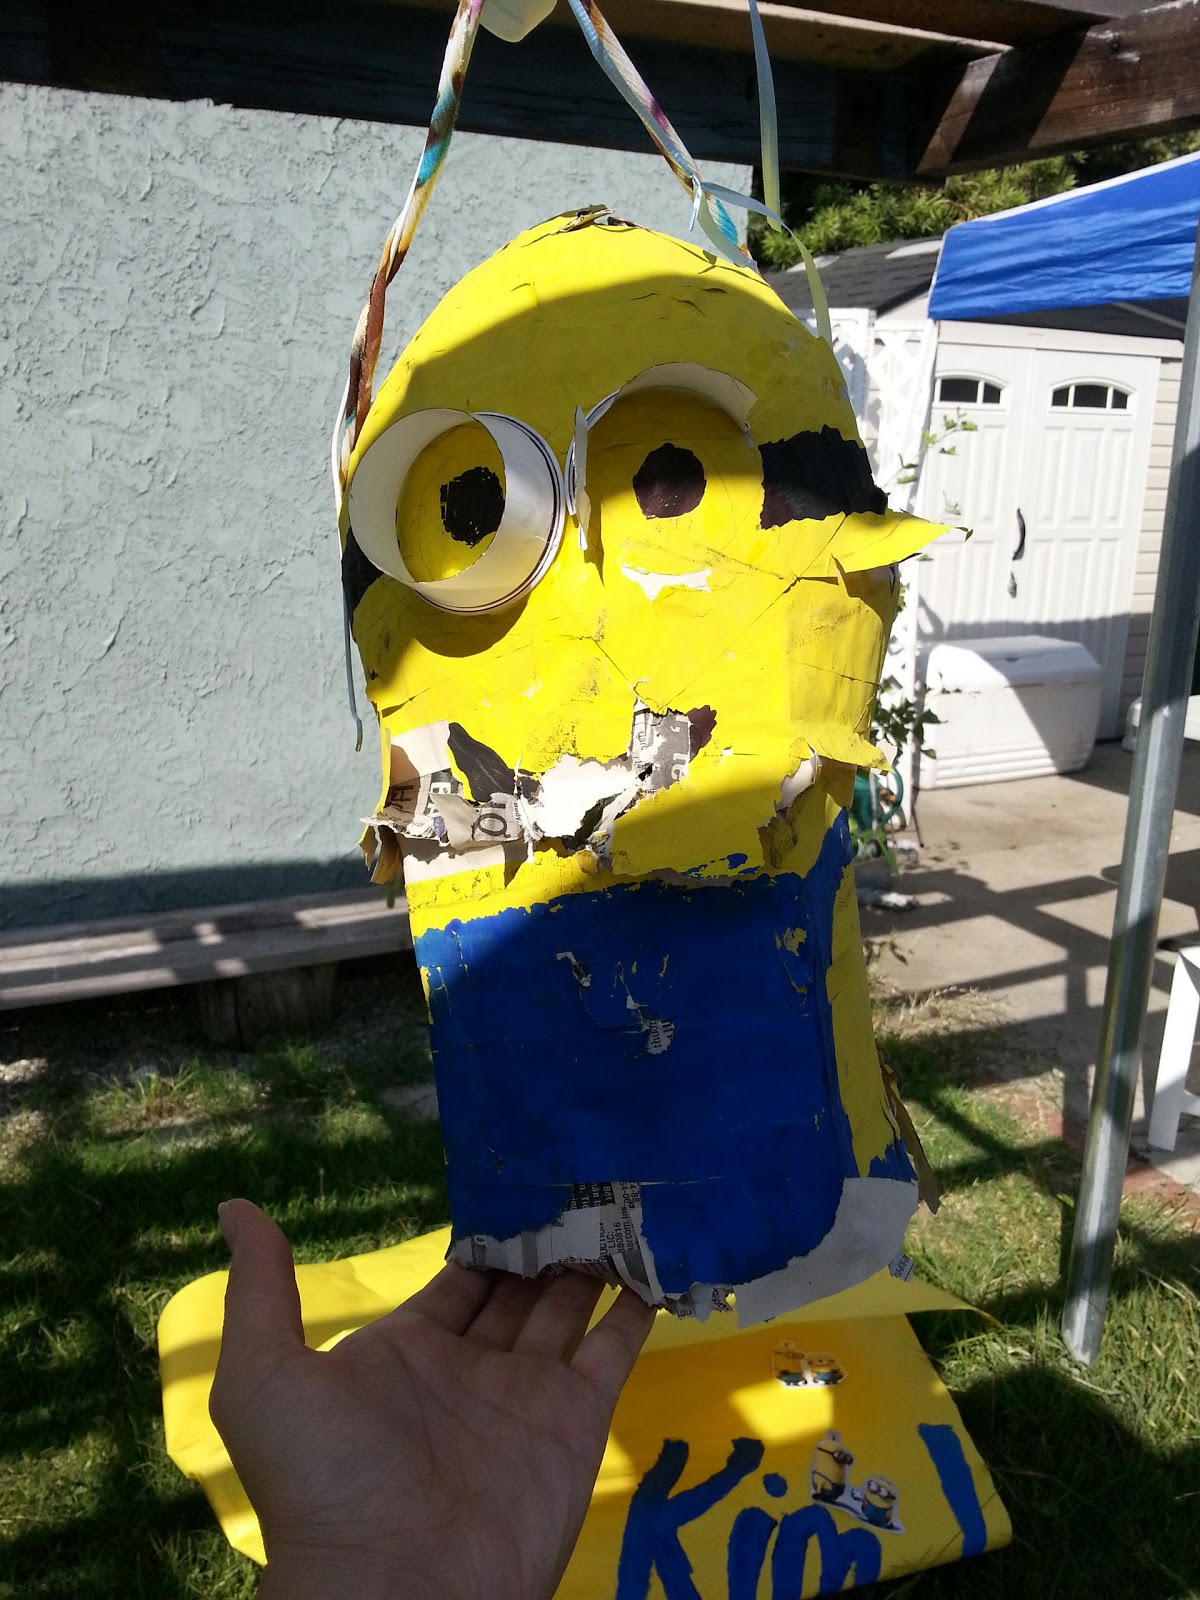
Minion Pinata

Hello there! Its PARTY Time! My Boyfriend's birthday and his sister's graduation was around the same time this Month (June 10 & 7), so his other sisters and I decided to throw them a SURPRISE PARTY. As you can see from the title and the pictures below, the theme was Minions. We really wanted a pinata for the party, so we created a Minion pinata. Below are the steps we took to make the pinata. It took us a couple of days/ sessions to finish the pinata because we were trying really HARD to keep it a secret, so we only spent a short amount of time on it each day. 

STEP 1: First, we blew up two balloons and tie the ends together. Then, we wrapped a piece a paper between the balloons to form the body of the minion. (We made a second one using a 12 pack soda box for the body instead of the paper - forgot to take a picture.)

STEP 2: We glued strips of newspaper using a mixture of 1/2 glue and water to both pinata. We repeated this step twice, maybe even three times to give it a thicker/stronger- built pinata. (The smaller pinata is the one made with a soda box around the body and the larger one is made using a piece of paper.)


STEP 3: After the newspaper was dried, we added another layer using white paper so we can paint over it. (This is a picture of the larger pinata that started to deflate and fall apart because the piece of paper was too weak and did not support the body properly, so we couldn't use it.)


Step 4: We painted the smaller pinata using yellow tempera paint as our base coat.


After it was dried, we added the minion's overalls using blue tempera; and his eyes, mouth, and goggle strap with black tempera paint.

Step 5: We cut the ends of two white cups and glued it to the pinata for the minion's goggles. 

Step 6: We cut a hole on top of the minion and added candy. Then we secured it with a 5 gallon water bottle lid, and tied a piece of rope to each side of the minion (Sorry forgot to take pictures).

Step 7: HIT THE PINATA!!!  

You can also go to Kathy's Blog to check out all the party favors she created for the party! 

I hope all of our ideas have inspired you! Now Go Throw a Minion Party!!! :D

LinkWithin

Related Posts Plugin for WordPress, Blogger...